Removal of the transverse tie rod must be carried out in the following order.
Prepare fixture «32.3.160». Fix the relative position of the wheel relative to the hub with paint or a marker. Hang the front of the car on stands and remove the front wheel. If necessary, remove the side panel of the crankcase protection.
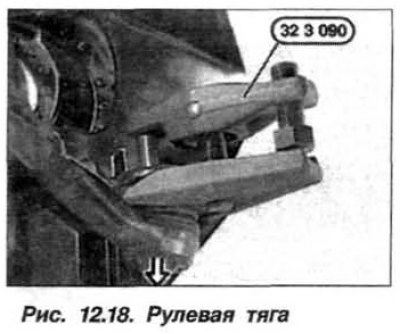
Using fixture «32.3.090» or standard type puller «779-1», unscrew the nut securing the ball joint on the swivel bearing (arrow, see fig. 12.18) and disconnect the tie rod. Cut off the clamps and remove the corrugated protective cover.

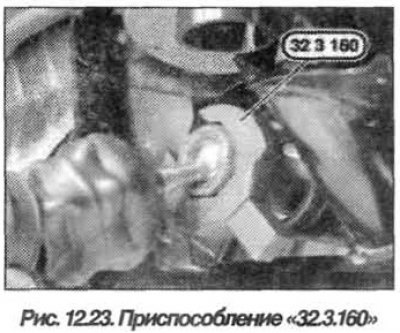
Insert the rack into the steering gear as far as possible. The tie rod is unscrewed from the gear rack using the tool «32.3.160» (pic. 12.23).

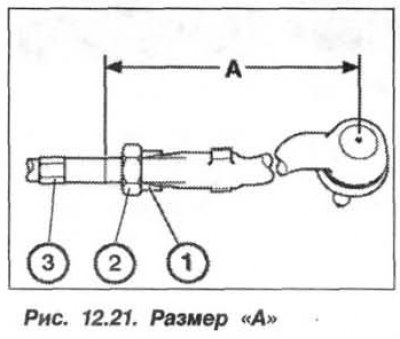
On the old steering rod, determine the size «A» (see fig. 12.21) and put it on a new rod, which will facilitate the adjustment of the convergence.

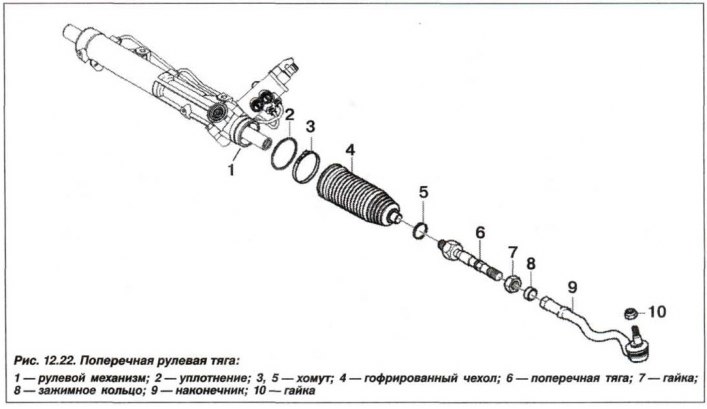
Install new bellows (4, see fig. 12.22) and clamps (3 and 5). Install the tie rod to the rack (right and left) and tighten it with a torque of 110–120 N·m (11.0–12.0 kgf·m). Replace the self-locking nut, there must be no traces of grease on the seating surface of the pivot bearing, and tighten it to a torque of 80 Nm (8.0 kgf·m).
Install the wheel and tighten the dry bolts of its fastening by hand. Lower the vehicle onto the wheels and tighten the wheel bolts crosswise to 140 Nm (14.0 kgf·m).
Loosen locknut (2, see fig. 12.21) tie rod on the left and right side. Rotating the tie rod by the hex (3), set a positive toe angle. Make sure that the cover on the traction does not rotate. Tighten locknut to 51 Nm (5.1 kgf·m).
Attention! Adjustment of the steered wheels is carried out necessarily on both steering rods at the same time. Tie rod ends must not have any gaps.
