Fore and aft seat adjustment
pull the lever (1) and set the seat to the desired position.
After releasing the lever, make sure the seat is securely locked.
Seat tilt adjustment
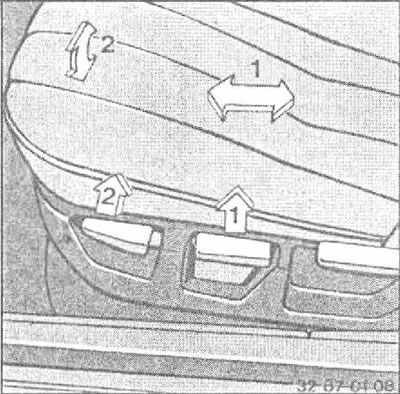
pull the lever (2) and set the desired seat angle.
Sports type seat*
This seat has the additional option of adjusting the knee support using a handle at the front at the base of the seat.
Seat back adjustment
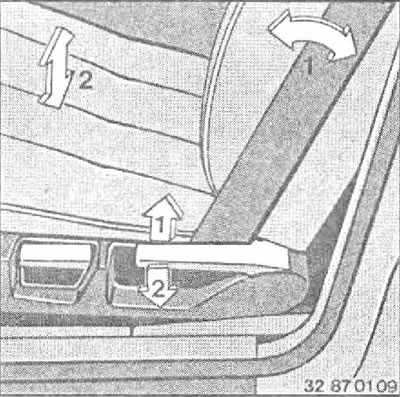
pull the lever (1) and adjust the seatback to the desired position.
Seat height adjustment
pull the lever (2) and set the seat to the desired position.
Attention: Do not adjust the position of the seats while driving, this may lead to an accident. Do not transport a passenger in the front seat with the seat back fully reclined.
Front and rear seat head restraints
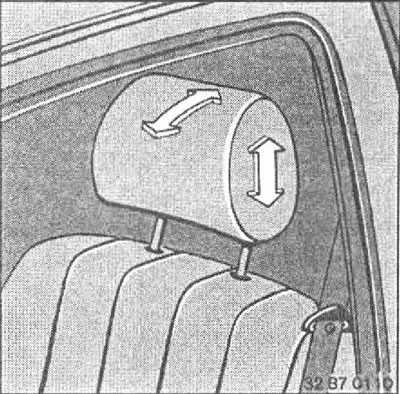
The height of the head restraint is adjusted by pulling it up or pushing it down.
The tilt of the head restraint is set by pushing the top edge forward or backward.
Attention: Head restraints reduce the traumatic consequences of accidents for the cervical vertebrae. The top edge of the head restraint should be at eye level (not under the neck).
Power seats
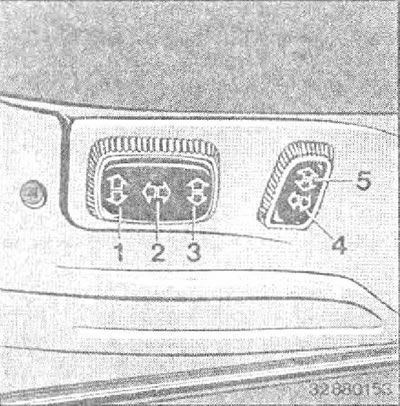
1 - Seat tilt adjustment
2 - Longitudinal movement of the seats
3 - Seat height adjustment
4 - Seat back adjustment
5 - Headrest height adjustment
Sports type seats*
This seat has the additional ability to adjust the knee support using a rocker switch located on the outside of the seat base (switch "A" on the right picture).
Storing the position of seats and mirrors
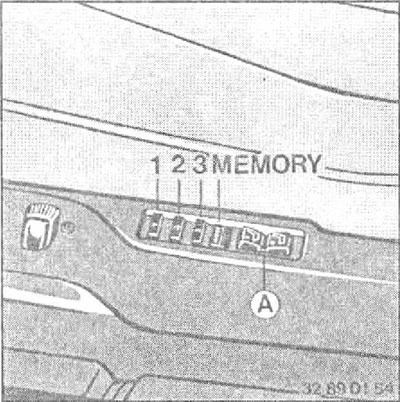
3 different seat positions and both outside mirrors can be programmed and recalled from the on-board computer.
Programming - starting from position (1) ignition key.
- Set the seats and mirrors to the desired position,
- Click the button "Memory": the indicator lamp signals readiness for programming.
- Press one of the buttons 1, 2 or 3, as required, the indicator lamp goes out.
Recall from memory
Open or close the driver's door with the automatic interior lights on, or turn the ignition key to (1):
Press and release one of the keys 1,2 or 3 according to your choice. The installation process is interrupted immediately after manipulations with the switches for setting the seats and mirrors or the memory buttons.
Close the driver's door and turn the ignition key to position 0 or 2:
Press and hold one of the desired keys 1, 2 or 3 until the installation process is complete.
Automatic deviation of the mirror farthest from the driver towards the roadbed
Move the mirror control switch to the position "Fahrerspiege!" ("Mirror on the driver's side").
When reverse gear is engaged or when the automatic transmission control lever is set to position R, the mirror farthest from the driver will slightly deviate so that, for example, when entering a parking lot, you can see the lower part of the side of the car and the edge of the curb stone. You can turn off this automation by moving the switch Mirror control to Beifahrerspiegel position ("Passenger side mirror").
Folding rear seat*
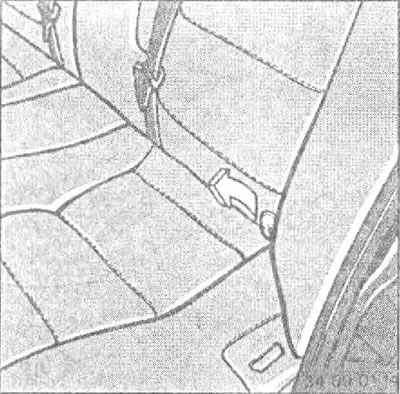
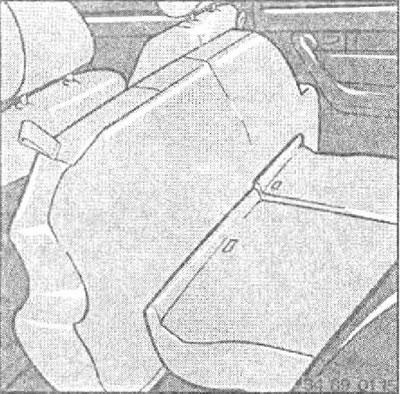
The back seat consists of three parts. The seat cushion and backrest can be folded down to accommodate long items. Pull the loops on the sides of the seat cushion and set it upright, while moving the front seat as far forward as possible.
The seatback latch is then automatically released and the seatback can be folded forward.
Attention: The outer corners of the backrests are fixed.
The head restraints* must first be removed by pulling strongly upwards so that the backrests can be folded down.
For removed headrests there is a place between the folded backrest and the door.
If the latch does not automatically release the backrest, press the lever shown by the arrow and lower the seatback forward.
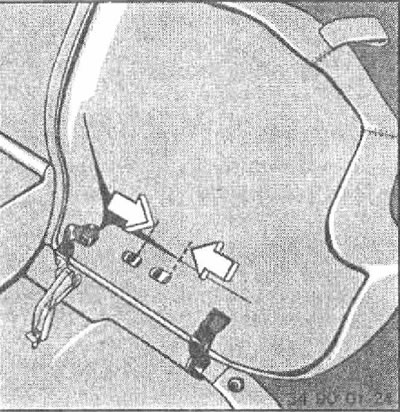
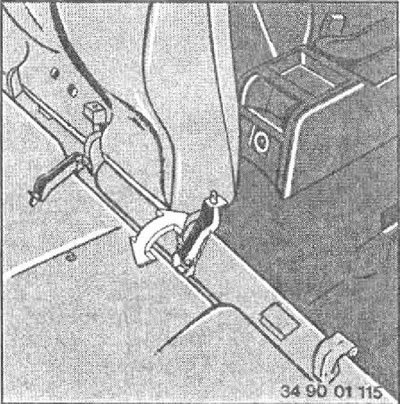
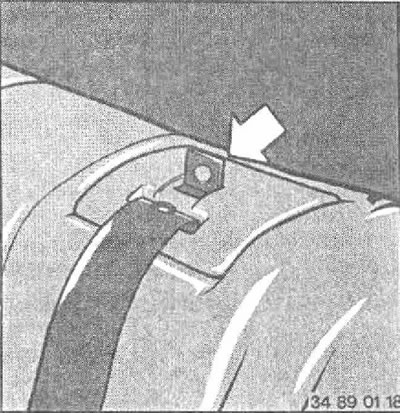
The seat cushion can be removed if desired.
Place the seat cushion upright, simultaneously press the latches and lift the cushion forward. Install in reverse order.
If the front passenger seat is moved forward as far as possible and the head restraint is removed (to remove the power head restraint, pull it up with a jerk), then its back can be completely folded back. After that, long items can be transported in the cabin.
To install the power head restraint, push it firmly down until it locks into place.
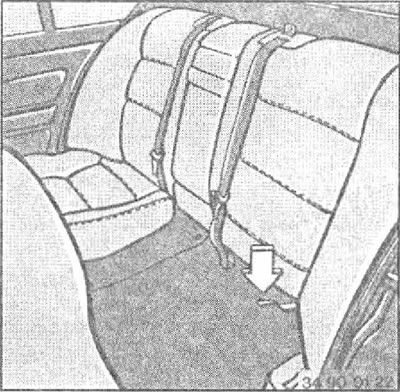
With the seat cushion removed, raise the lever (arrow) and the red backrest lock is fixed on the lever pin.
Attention: When installing the seat cushion, the lever must be lowered again.
Pay attention to the fact that the load placed in the cabin must be securely fastened, otherwise the driver and passengers may be injured during sudden braking or turning.
When installing the seatback, make sure that the seatback is securely locked in order for the seat belt to function properly. At the same time, the red latch (arrow) should go down.
If the seatback is not installed correctly, the seatbelt cannot be pulled out.
Seat back deflection adjustment*
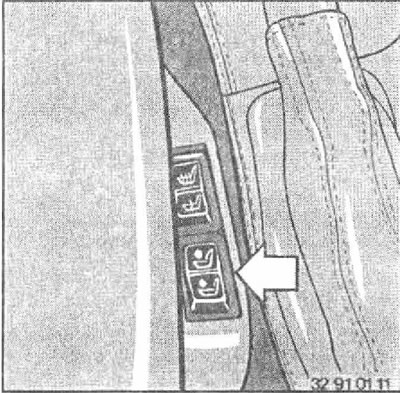
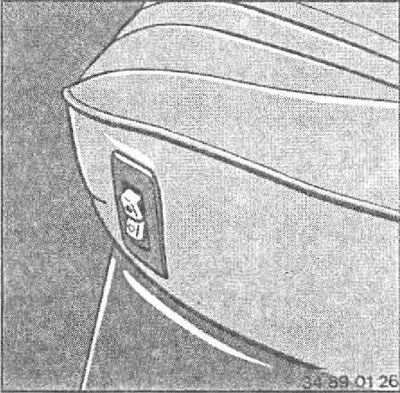
Adjustment is carried out using a switch located on the seat base on the inside.
By pressing the switch in front or behind, respectively, the increase or decrease in the convexity of the backrest contour is achieved. Thus, the support of the shoulders and spine is provided, which contributes to a correct and free fit.
Power rear seat head restraints*
If a passenger in the back seat wears a seat belt (this is always recommended), the head restraint will automatically extend.
A rocker switch is used to adjust its height.
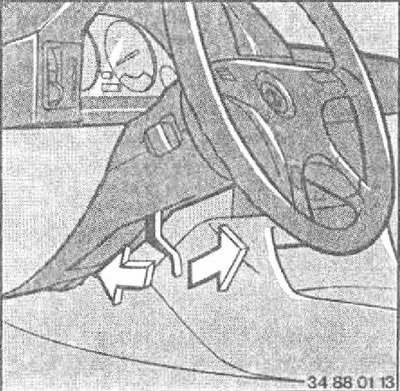
Steering wheel adjustment*
Pull the lever towards you and set the steering wheel to the desired position. Release the lever and make sure the selected position is securely locked.
Caution: Do not adjust the steering wheel while driving as this could result in loss of vehicle control.
