Withdrawal

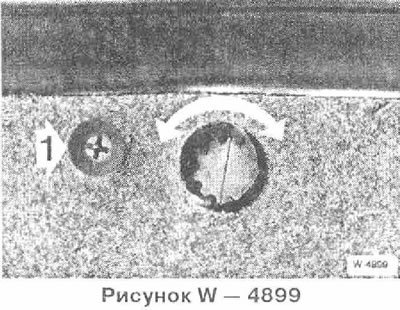
Release screws 1 on lower edge of tailgate trim.
Pull back the bottom trim a little.

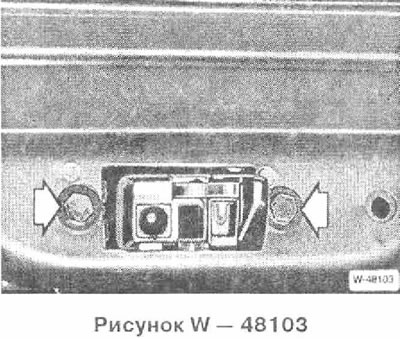
Unscrew the 2 bolts securing the lock and move the lock inward.
Disconnect connector. Disconnect the connecting rod from the lock.
Pull the lock out to the side.
Removing the lock cylinder

Disconnect the connector while squeezing the latch tabs.
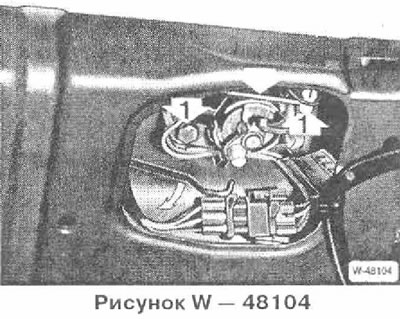
Disconnect the two rods from the lock cylinder by pressing in the direction of the arrows.
Unscrew bolts 1, remove cylinder from inside.
If required, unscrew the 2 bolts securing the central locking actuator motor and pull out the motor.
Installation
Insert lock cylinder and secure with 2 screws. Connect connector.
Fasten the lock with 2 screws.
On vehicles with a central locking system: Connect to the lock actuator rod and then insert it into the lock cylinder. To do this, turn the plastic clip so that the notch is at the bottom. Then insert the connecting rod.
Check the functioning of the lock and the central locking system.
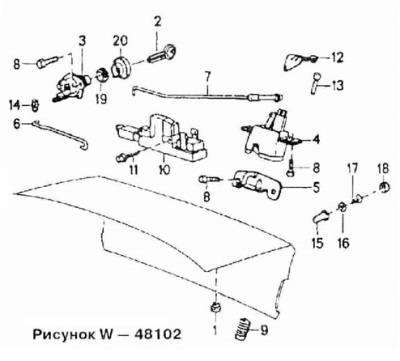
Note: The play of the rods can be compensated by turning the spherical cup on the rod 7 or by moving the actuator motor in the mounting holes (Drawing W - 48102).
Install luggage compartment trim.
If required, adjust tailgate lock.

Drawing W - 48102
1 rubber stopper
2 key
3 Lock cylinder
4 Castle
5 Locking bracket
6 Connecting rod
7 Connecting rod
8 Bolt
9 Stop buffer
10 Central locking actuator
11 Bolt
12 Bracket
13 Thrust
14 Rod clamp
15 Insert nut
16 Washer
17 Self-tapping screw
18 Protective cap
19 Gasket
20 push button
