If the radiator is to be removed due to leaks, keep in mind that small leaks can be repaired with a radiator sealant without removing the radiator from the vehicle.
Withdrawal
1. Disconnect the negative battery cable (see chapter 5A).
2. Drain the coolant (see chapter 1).
6 cylinder engine
3. Remove the air cleaner (see chapter 4A).
4. Remove the viscous or motorized cooling fan (depending on the model). You only need to remove the radiator located in the engine compartment. It is not necessary to remove the outdoor fan.
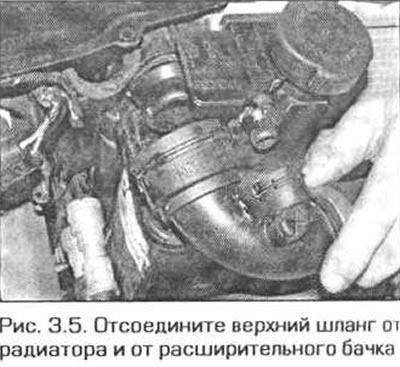
5. Remove the wire clamps and disconnect the upper hose from the radiator and from the expansion tank (pic. 3.5).
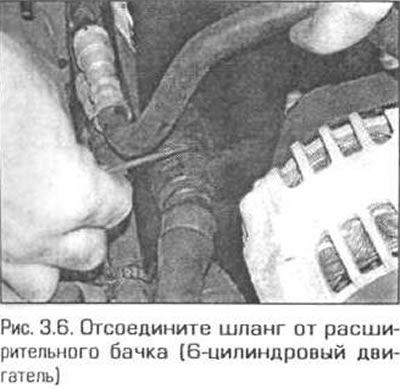
6. Remove the wire clamp and disconnect the hose from the expansion tank (pic. 3.6).
4 cylinder engine
7. Remove the fan and fan shroud (see paragraph 6).
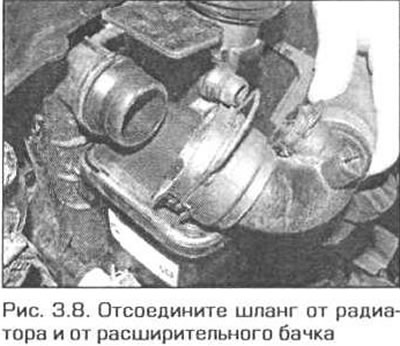
8. Remove the wire clamps and disconnect the upper hose from the radiator and from the expansion tank (pic. 3.8).
All models
9. Remove the wire clamp and disconnect the bottom hose from the radiator.
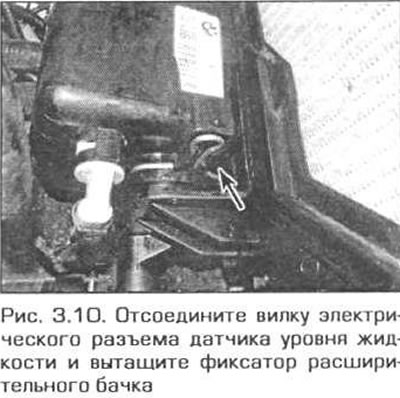
10. From the bottom of the expansion tank, disconnect the electrical wiring from the liquid level sensor. Pull the retainer out of the base of the expansion tank (pic. 3.10).
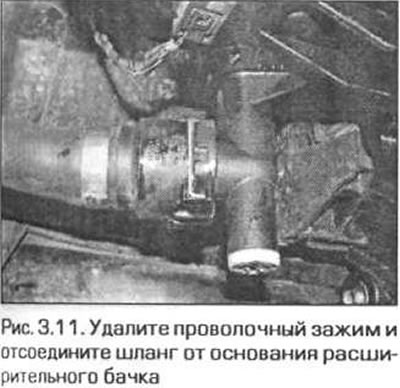
11. Disconnect the hose from the expansion tank base (pic. 3.11) or from the radiator on its left side (depending on the model). Remove the expansion tank from the radiator.
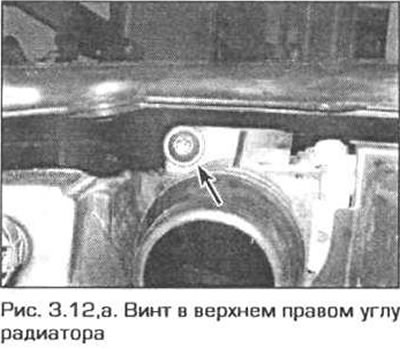
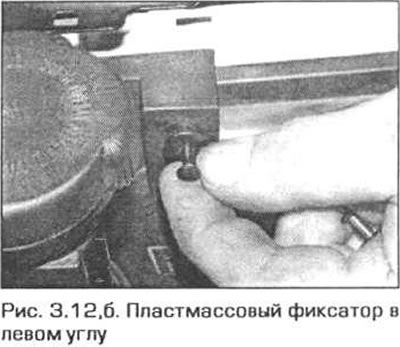
12. Depending on the model, the heatsink can be secured with one or two screws and one plastic retainer at the top corners of the heatsink (pic. 3.12, a, b). Remove the screws. Pull the center pin out of the latch, then hook and pull out the latch itself. Pull the radiator up and out of the car.
Status check
13. If the radiator was removed because it is clogged, flush it backwards as directed in chapter 1.
14. Clean the radiator core from dirt and insects with compressed air (in this case, wear safety goggles) or soft brush. Be careful - the core plates are sharp and break easily.
15. If necessary, a radiator specialist can perform a test to determine if a blockage exists.
16. Have a leaking radiator repaired by a specialist. Do not try to solder or boil a leaking radiator yourself: most likely you will just ruin it even more.
17. Inspect the lower rubber radiator mounts for damage or signs of decomposition. If necessary, replace the supports.
Installation
18. Installation is carried out in sequence. the reverse of the withdrawal, taking into account the following remarks.
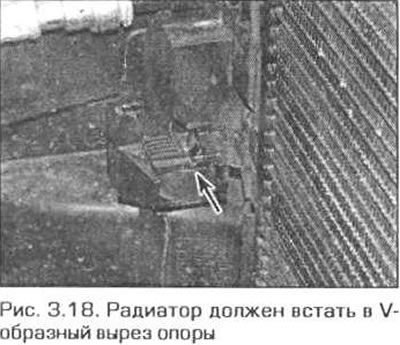
- A) Make sure. that the rubber radiator mounts are in place. Lower the heatsink onto the supports and secure from above with screws and retainer (pic. 3.18).
- b) Attach the fan shroud to the heatsink.
- V) Connect the hoses to their original places and secure them with clamps.
- G) Check the condition of the sealing ruts on the radiator pipes and, if necessary, replace them.
- d) Finally, connect the battery and fill the cooling system.
