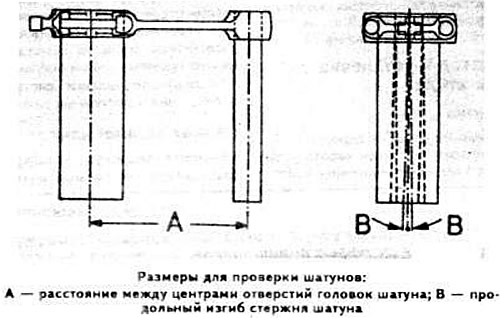
Measure the concentricity of the centers of the holes of the connecting rod heads, the distance «A» between which I should be within 150-0.04 mm, and the longitudinal bend «IN» rod of the connecting rod, which should not exceed 0°-30'.

Make sure that the connecting rods belong to the same mass group: connecting rods without bearing shells should not differ from each other in mass by no more than±4 g. The mass groups of connecting rods are marked with paint.
When erasing the marks, compare the connecting rods by weight, using one of them as a reference.
When connecting the piston to the connecting rod, it is necessary that the piston pin, lubricated with engine oil, enter the hole in the bushing of the upper head of the connecting rod by simply pressing the thumb.
Wipe dry the connecting rod journals of the crankshaft. Lay a piece of plastic gauge wire on the surface of the crankpin. Install the connecting rod with a cap on the neck and tighten the nuts of the previously used connecting rod bolts.
Remove the cover and, using the scale printed on the package, by flattening the wire, determine the amount of clearance between the liner and the connecting rod journal.
Lubricate the connecting rod journal with engine oil and install the connecting rod with the cap on the neck.
Tighten the nuts of the new connecting rod bolts to 2.0 kgf·m, then tighten them 70°.
